How to Install WordPress with Apache on Ubuntu 18.04
Updated on
•6 min read
WordPress is by far the most popular open-source blogging and CMS platform that powers over a quarter of the world’s websites. It is based on PHP and MySQL and packs a ton of features that can be extended with free and premium plugins and themes. WordPress enables you to easily build your eCommerce store, website, portfolio or blog.
In this tutorial, we will show you how to install WordPress on an Ubuntu 18.04 machine. It is a fairly straightforward process that takes less than ten minutes to complete. At the time of writing this article, the latest version of WordPress is version 5.0.2.
We’ll be using a LAMP stack with Apache as a web server, SSL certificate, the latest PHP 7.2 and MySQL/MariaDB as a database server.
Prerequisites
Ensure the following prerequisites are met before continuing with this tutorial:
- Have a domain name pointing to your server public IP. We’ll use
example.com. - Logged in as a user with sudo privileges .
- Apache installed by following these instructions .
- You have an SSL certificate installed for your domain. You can install a free Let’s Encrypt SSL certificate by following these instructions .
Update the packages list and upgrade the installed packages to the latest versions:
sudo apt updatesudo apt upgrade
Creating a MySQL database
WordPress uses MySQL database to store all its data like posts, pages, users, plugins and themes settings. We’ll start by creating a MySQL database, MySQL user account and grant access to the database.
If you don’t have MySQL or MariaDB installed on your Ubuntu server you can do that by following one of the guides below:
Login to the MySQL shell by typing the following command:
sudo mysqlFrom within the MySQL shell, run the following SQL statement to create a database :
CREATE DATABASE wordpress CHARACTER SET utf8mb4 COLLATE utf8mb4_general_ci;Next, create a MySQL user account and grant access to the database:
GRANT ALL ON wordpress.* TO 'wordpressuser'@'localhost' IDENTIFIED BY 'change-with-strong-password';Finally, exit the mysql console by typing:
EXITInstalling PHP
PHP 7.2 which is the default PHP version in Ubuntu 18.04 is fully supported and recommended for WordPress.
To install PHP and all required PHP extensions run the following command:
sudo apt install php7.2 php7.2-cli php7.2-mysql php7.2-json php7.2-opcache php7.2-mbstring php7.2-xml php7.2-gd php7.2-curlRestart apache so the newly installed PHP extensions are loaded:
sudo systemctl restart apache2Downloading Wordpress
Before downloading the Wordpress archive, first create a directory which will hold our WordPress files:
sudo mkdir -p /var/www/example.comThe next step is to download the latest version of WordPress from the WordPress download page using the following wget command :
cd /tmpwget https://wordpress.org/latest.tar.gz
Once the download is complete, extract the archive and move the extracted files into the domain’s document root directory:
tar xf latest.tar.gzsudo mv /tmp/wordpress/* /var/www/example.com/
Set the correct permissions so that the web server can have full access to the site’s files and directories using the following chown command :
sudo chown -R www-data: /var/www/example.com
Configuring Apache
By now, you should already have Apache with SSL certificate installed on your system, if not check the prerequisites for this tutorial.
The next step is to edit the Apache virtual hosts configuration for our WordPress domain:
sudo nano /etc/apache2/sites-available/example.com.confThe following Apache configuration redirects HTTP to HTTPS
and www to non-www version of your domain and enables HTTP2. Don’t forget to replace example.com with your Wordpress domain and set the correct path to the SSL certificate files.
<VirtualHost *:80>
  ServerName example.com
  ServerAlias www.example.com

  Redirect permanent / https://example.com/
</VirtualHost>

<VirtualHost *:443>
  ServerName example.com
  ServerAlias www.example.com

  Protocols h2 http/1.1

  <If "%{HTTP_HOST} == 'www.example.com'">
    Redirect permanent / https://example.com/
  </If>

  DirectoryIndex index.html index.php
  DocumentRoot /var/www/example.com

  ErrorLog ${APACHE_LOG_DIR}/example.com-error.log
  CustomLog ${APACHE_LOG_DIR}/example.com-access.log combined

  SSLEngine On
  SSLCertificateFile /etc/letsencrypt/live/example.com/cert.pem
  SSLCertificateKeyFile /etc/letsencrypt/live/example.com/privkey.pem
  SSLCertificateChainFile /etc/letsencrypt/live/example.com/chain.pem

  <Directory /var/www/example.com>
      Options FollowSymLinks
      AllowOverride All
      Require all granted
  </Directory>

</VirtualHost>
Enable the virtual host for the domain. The command below will create a symbolic link from the sites-available to the sites-enabled directory:
sudo a2ensite example.comFor the new configuration to take effect, restart the Apache service by typing:
sudo systemctl restart apache2Completing the WordPress Installation
Now that Wordpress is downloaded and the server configuration is complete, it is time to finalize the WordPress installation through the web interface.
Open your browser, type your domain and a screen similar to the following will appear:
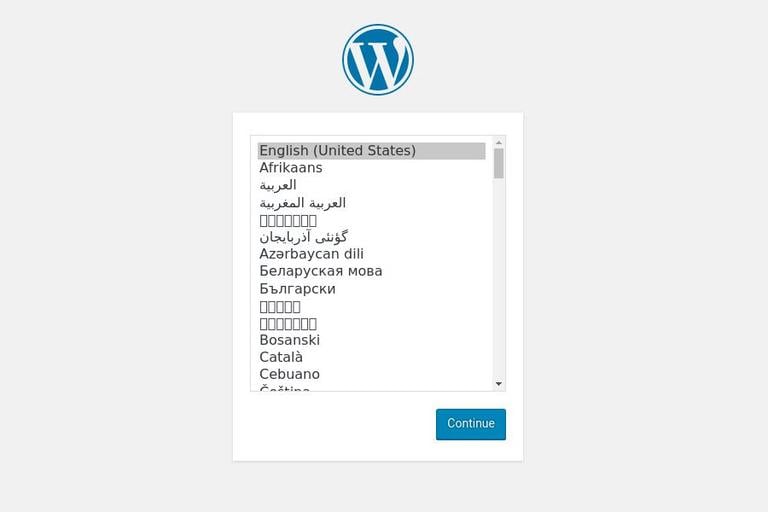
Select the language you would like to use and click on the Continue button.
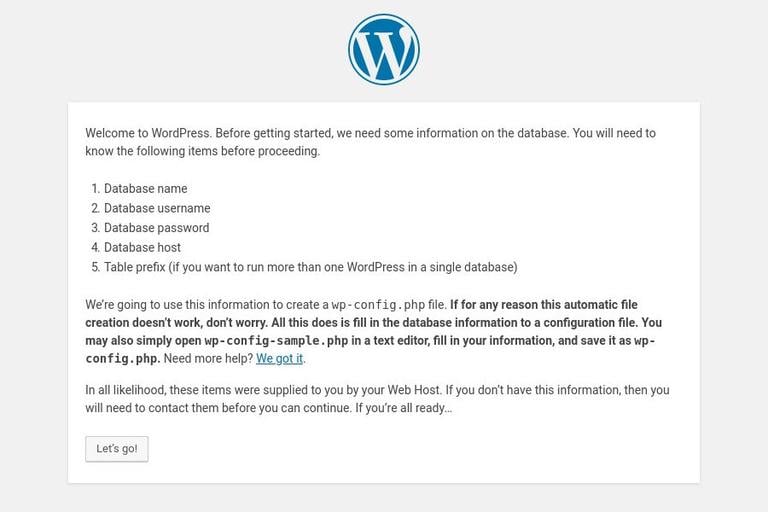
Next, you will see the following information page, click on the Let's go! button.
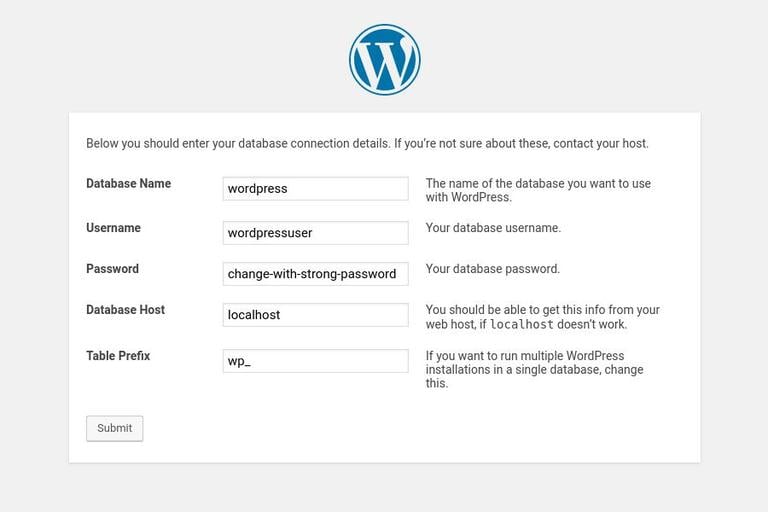
On the next screen, the setup wizard will ask you to enter your database connection details. Enter the MySQL user and database details you previously created.
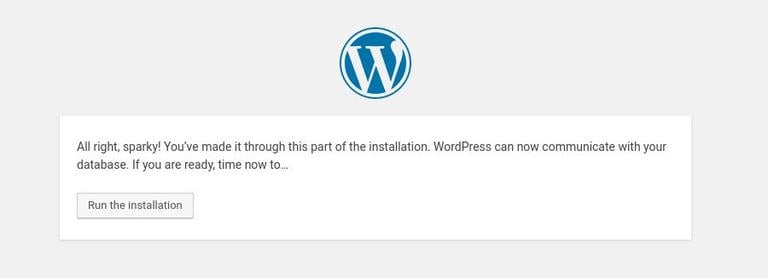
Start the installation by clicking on the Run the Installation button.
In the next step, you’ll need to enter a name for your WordPress site and choose a username (for security purposes do not enter “admin” ).
The installer will automatically generate a strong password for you. Do not forget to save this password. You can also set the password by yourself.
Enter your email address and select whether you want to discourage search engines from indexing the site (not recommended).
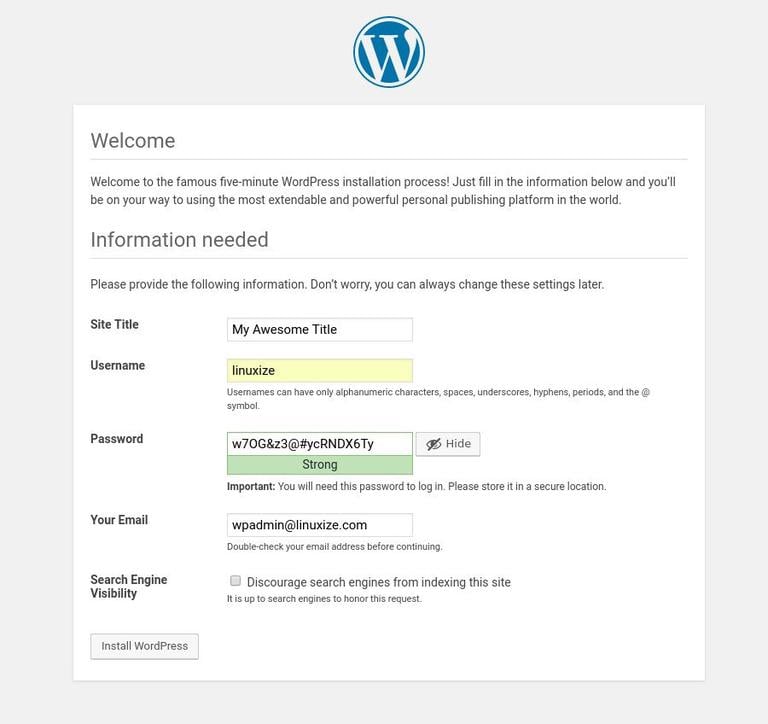
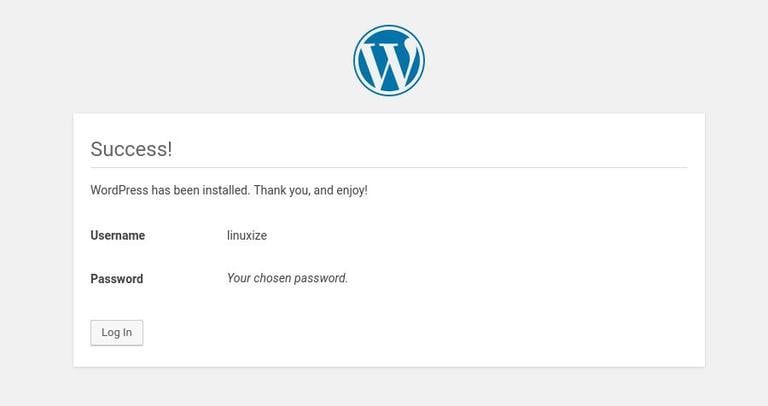
Click Install WordPress and once the installation is completed you will be taken to a page informing you that WordPress has been installed. To access your WordPress login form click on the Log in button.
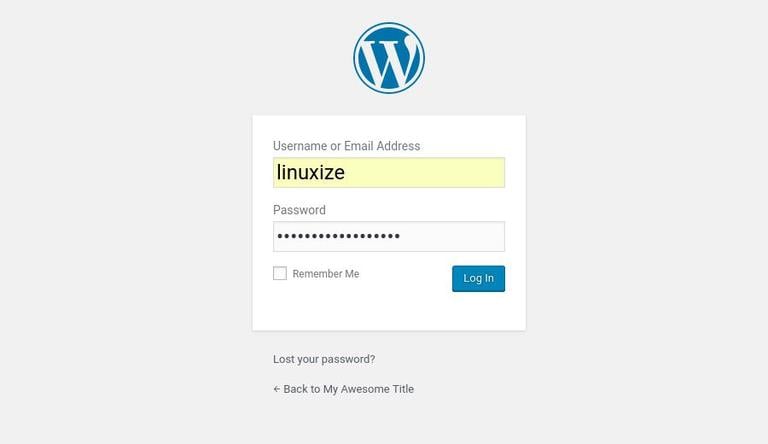
Enter your username and password and click on the Log in button.
Once you log in, you will be redirected to the WordPress administration dashboard.
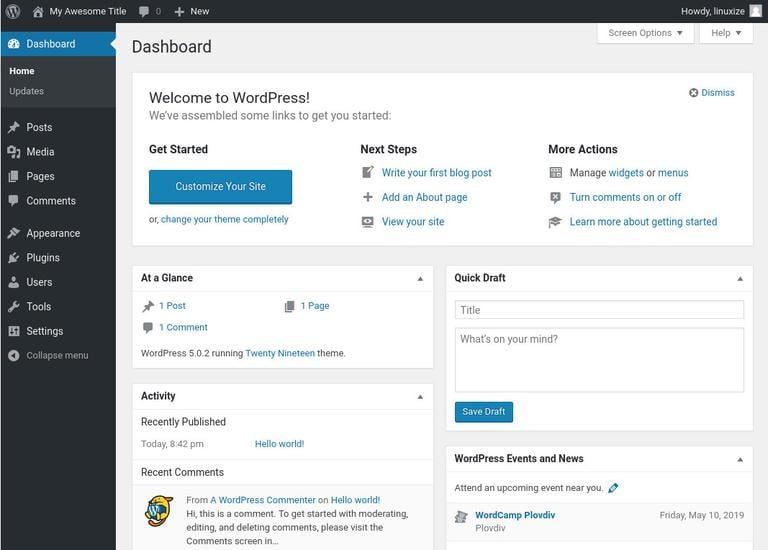
From here, you can start customizing your WordPress installation by installing new themes and plugins.
Conclusion
Congratulations, you have successfully installed WordPress with Apache on your Ubuntu 18.04 server. First Steps With WordPress is a good starting place to learn more about how to get started with WordPress.
If you have questions, feel free to leave a comment below.