How to Install Laravel on Ubuntu 18.04
Updated on
•6 min read

Laravel is an open-source PHP web application framework with expressive, elegant syntax. Laravel allows you to easily build scalable and flexible web applications, restful APIs and eCommerce solutions.
With build-in features such as routing, authentication, sessions, caching and unit testing Laravel is a framework of choice for many PHP developers.
In this tutorial we will show you how to install Laravel on an Ubuntu 18.04 system. The same instructions apply for Ubuntu 16.04 and any Ubuntu based distribution, including Linux Mint, Kubuntu and Elementary OS.
Prerequisites
Before continuing with this tutorial, make sure you are logged in as a user with sudo privileges .
Update the system packages to the latest versions:
sudo apt update && sudo apt upgradeInstalling PHP
PHP 7.2 which is the default PHP version in Ubuntu 18.04 is fully supported and recommended for Laravel 5.7.
Run the following command to install PHP and all required PHP modules:
sudo apt install php7.2-common php7.2-cli php7.2-gd php7.2-mysql php7.2-curl php7.2-intl php7.2-mbstring php7.2-bcmath php7.2-imap php7.2-xml php7.2-zipInstalling Composer
Composer is a dependency manager for PHP and we will be using it to download the Laravel core and install all necessary Laravel components.
To install composer
globally, download the Composer installer with curl
and move the file to the /usr/local/bin directory:
curl -sS https://getcomposer.org/installer | sudo php -- --install-dir=/usr/local/bin --filename=composerVerify the installation by printing the composer version:
composer --versionThe output should look something like this:
Composer version 1.8.0 2018-12-03 10:31:16
Installing Laravel
At the time of writing this article, the latest stable version of Laravel is version 5.7.
Run the Composer create-project command to install Laravel in the my_app directory:
composer create-project --prefer-dist laravel/laravel my_appThe command above will fetch all required php packages. The process may take a few minutes and if it is successful the end of the output should look like the following:
Package manifest generated successfully.
> @php artisan key:generate --ansi
Application key set successfully.
At this point you have Laravel installed on your Ubuntu system.
When installed via Composer, Laravel will automatically create a file named .env. This files includes custom configuration variables including the database credentials. You can read more about how to configure Laravel here
.
You can start the development server by navigating to the Laravel project directory and executing the artisan serve command:
cd ~/my_appphp artisan serve
The output will look something like this:
Laravel development server started: <http://127.0.0.1:8000>
Laravel can use SQLite, PostgreSQL , MongoDB or MySQL /MariaDB database to store all its data.
If you want to use Laravel Mix to compile assets you’ll need to install Node.js and Yarn .
Verifying the Installation
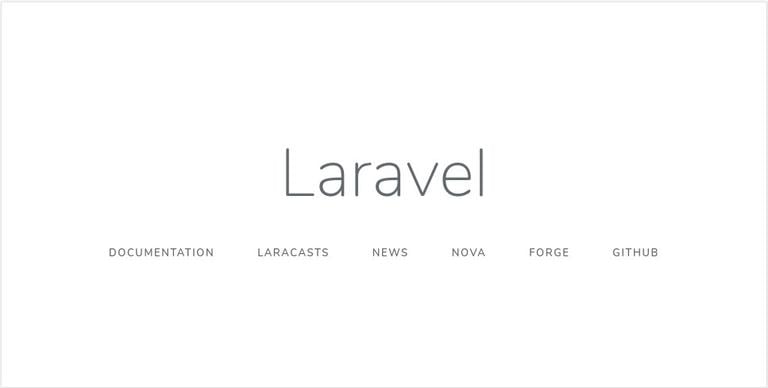
Open your browser, type http://127.0.0.1:8000 and assuming the installation is successful, a screen similar to the following will appear:

Conclusion
Congratulations, you have successfully installed Laravel 5.7 on your Ubuntu 18.04 machine. You can now start developing your application.
If you have questions, feel free to leave a comment below.


