How to Install IntelliJ IDEA on Ubuntu 18.04
Updated on
•6 min read

IntelliJ IDEA is a full-featured IDE for JVM and Android Development. It has built-in debugging support, Docker and Docker Compose support, embedded Git control, integrates major build automation tools such as Maven and Gradle , syntax highlighting, code completion, ssh terminal, code refactoring, and rich navigation capabilities.
IntelliJ IDEA is extensible via plugins and offers support for Java frameworks such as Swing and JavaFX. It can also be used for development in other programming languages such as Python , Kotlin, Groovy, Scala, Erlang, Dart and more.
IntelliJ IDEA is available in two editions, Community and Ultimate. For more information about the differences between the two editions visit the editions comparison matrix .
This tutorial explains how to install IntelliJ IDEA on Ubuntu 18.04. The same instructions apply for Ubuntu 16.04 and any Ubuntu-based distribution, including Kubuntu, Linux Mint, and Elementary OS.
Prerequisites
- Minimum 2 GB RAM, 4 GB RAM recommended
- 1.5 GB hard disk space + at least 1 GB for caches
- 1024x768 minimum screen resolution
You’ll need to be logged in as a user with sudo access to be able to install packages on your Ubuntu system.
Installing IntelliJ IDEA
The easiest way is to install IntelliJ IDEA on Ubuntu 18.04 is by using the snappy packaging system.
To download and install the IntelliJ IDEA snap package, open your terminal using the Ctrl+Alt+T keyboard shortcut and type:
sudo snap install intellij-idea-community --classicintellij-idea-community with intellij-idea-ultimate.The download may take some time depending on your connection speed. On successful installation, you will see the following output:
intellij-idea-community 2018.3.4 from 'jetbrains' installed
That’s it. IntelliJ IDEA has been installed on your Ubuntu desktop.
Starting IntelliJ IDEA
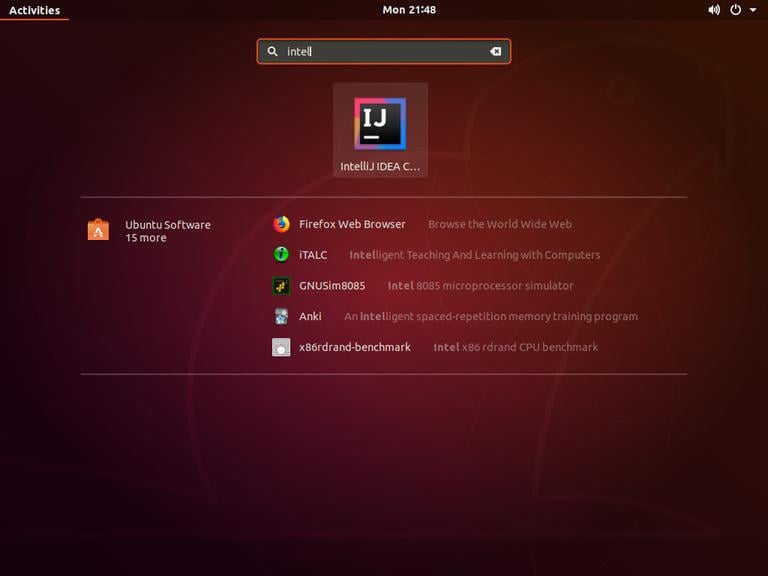
Now that IntelliJ IDEA is installed on your Ubuntu system you can start it by clicking on the IntelliJ IDEA icon (Activities -> IntelliJ IDE):
When you start IntelliJ IDEA for the first time, a window like the following will appear asking you to import IntelliJ IDE settings from a previous installation:

Make your selection and click OK to proceed.
Next, you will be prompted to accept the privacy policy. Scroll to the end select the confirmation checkbox and click on the Continue button. You will be also asked whether you want to send anonymous data statistic to JetBrains.
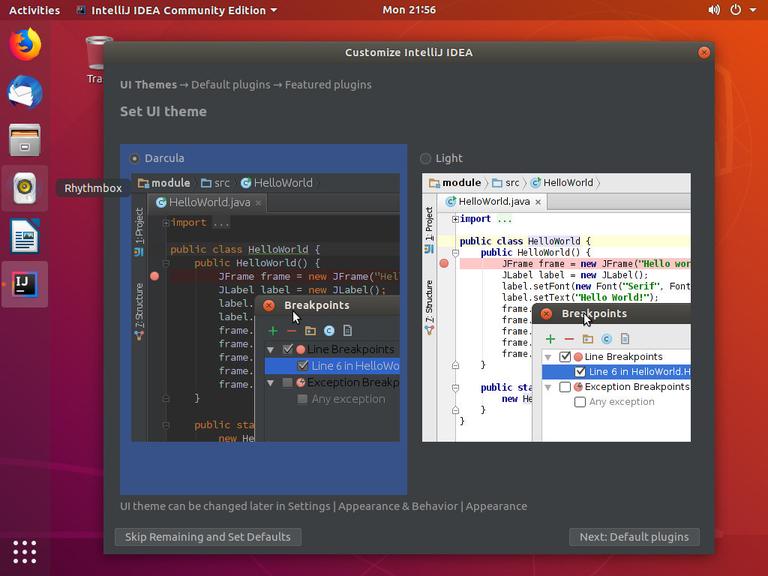
On the next screen you can customize your IntelliJ IDEA installation and install addition plugins:
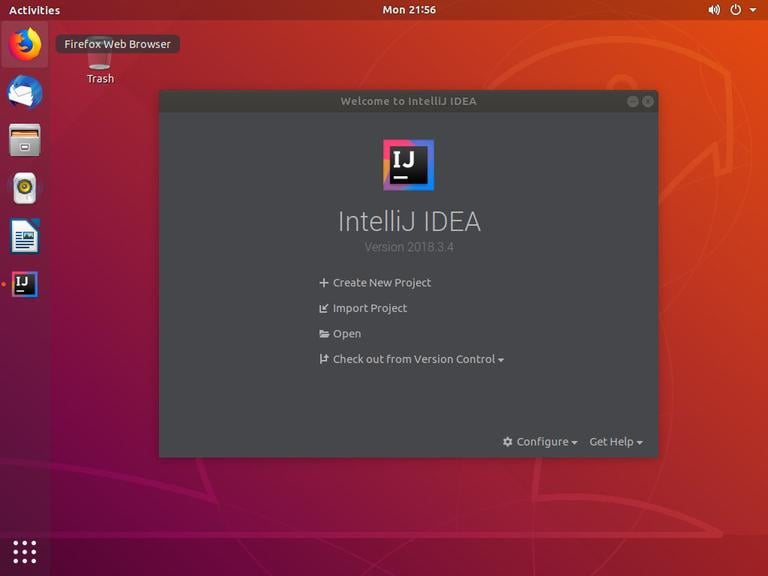
Once you finish the customization you can create a new Project.
Conclusion
You have learned how to install IntelliJ IDEA on your Ubuntu 18.04 desktop. You can now explore your new IDE and start working on your Python projects.
To find more information about how to get started with IntelliJ IDEA visit the IntelliJ IDEA documentation page.
If you have any questions, please leave a comment below.