How to Install and Configure VNC on CentOS 8
Updated on
•6 min read
Virtual Network Computing (VNC) is a graphical desktop sharing system that allows you to use your keyboard and mouse to remotely control another computer.
This article covers the steps to install and configure a VNC server on CentOS 8. We’ll also show you how to securely connect to the VNC server through an SSH tunnel.
Prerequisites
To follow this guide, you need to be logged in as a user with sudo privileges on your remote CentOS machine.
Installing Desktop Environment
Generally, servers don’t have a desktop environment installed. If the machine you want to connect to doesn’t have GUI, the first step is to install it. Otherwise, skip this step.
Run the following command to install Gnome, the default desktop environment in CentOS 8 on your remote machine:
sudo dnf groupinstall "Server with GUI"Depending on your system, downloading and installing the Gnome packages and dependencies may take some time.
Installing VNC Server
TigerVNC is an actively maintained high-performance open-source VNC server. It is available in the default CentOS repositories. To install it, type:
sudo dnf install tigervnc-serverConfiguring VNC Server
In CentOS 8, TigerVNC is configured using the systemd daemon.
In this example, we’ll show you how to configure TigerVNC for one or more VNC users.
Use the
vncpasswdcommand to set up the password. Run the command as the user that will access the VNC server, do not usesudo:vncpasswdYou will be prompted to enter and confirm the password and whether to set it as a view-only password. If you choose to set up a view-only password, the user will not be able to interact with the VNC instance with the mouse and the keyboard.
The first time the
vncpasswdcommand is run, it will create and store the password file in the user’s~/.vncdirectory.Password: Verify: Would you like to enter a view-only password (y/n)? n A view-only password is not usedIf you’re adding a second user, switch to it and set the password with
vncpasswd.The next step is to configure TigerVNC to use Gnome. VNC reads the user configuration settings from the
~/.vnc/configfile. Open the file and add the following:vim ~/.vnc/configsession=gnome geometry=1920x1200 localhost alwayssharedThe
sessionoption specifies the session you want to start, and thegeometryoption specifies the size of the VNC desktop.Save and close the file . If you’re adding multiple users, repeat the same step.
TigerVNC ships with a file that allows you to map a user to a particular port. The mapping is configured in the
/etc/tigervnc/vncserver.usersfile:sudo vim /etc/tigervnc/vncserver.usersThe file uses
<display_port>=<username>syntax. In the example below, we are mapping display port:1to user linuxize. Use the same format to add more users.# TigerVNC User assignment # # This file assigns users to specific VNC display numbers. # The syntax is <display>=<username>. E.g.: # # :2=andrew # :3=lisa :1=linuxize:1is the display port number on which the VNC server will run. In our case, the server is running on TCP port5901(5900+1). If you map another user, for example, to display port:2, the server will also listen on port5902(5900+2).What is important to understand is that when working with VNC servers,
:Xis a display port that refers to5900+X.
Starting the Tigervnc Server
Once you’re done with the configuration, the last step is to start the VNC server.
To start and enable the VNC service for the user mapped to the display port :1, enter:
sudo systemctl enable vncserver@:1 --nowThe VNC server will listen on port 5901, as we discussed in the previous section.
You can verify that the service is successfully started with:
sudo systemctl status vncserver@:1● vncserver@:1.service - Remote desktop service (VNC)
Loaded: loaded (/usr/lib/systemd/system/[email protected]; enabled; vendor preset: disabled)
Active: active (running) since Thu 2020-12-17 21:49:41 UTC; 8s ago
...
To enable VNC for other users, simply replace 1 with the display port mapped to the user.
Connecting to VNC server
VNC is not an encrypted protocol and can be subject to packet sniffing. The recommended approach is to create an SSH tunnel
to securely forward traffic from your local machine on port 5901 to the remote server on the same port.
Set Up SSH Tunneling on Linux and macOS
If you run Linux, macOS, or any other Unix-based operating system on your machine, you can easily create a tunnel using the following ssh
command:
ssh -L 5901:127.0.0.1:5901 -N -f -l username remote_server_ipYou will be prompted to enter the user password.
Do not forget to replace username and server_ip_address with your username and the IP address of your server.
Set Up SSH Tunneling on Windows
Windows users can set up SSH Tunneling using PuTTY .
Open Putty and enter your server IP Address in the Host name or IP address field.
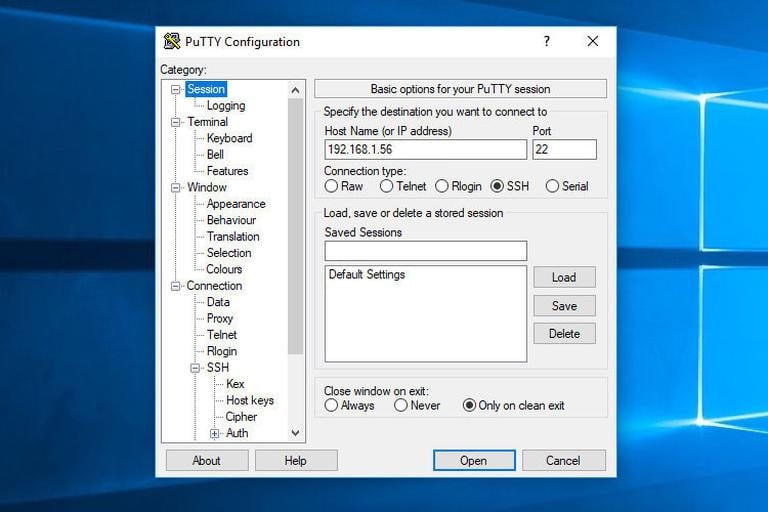
Under the Connection menu, expand SSH and select Tunnels. Enter the VNC server port (5901) in the Source Port field, enter server_ip_address:5901 in the Destination field and click on the Add button as shown in the image below:

Go back to the Session page to save the settings so that you do not need to enter them each time. To login to the remote server, select the saved session and click on the Open button.
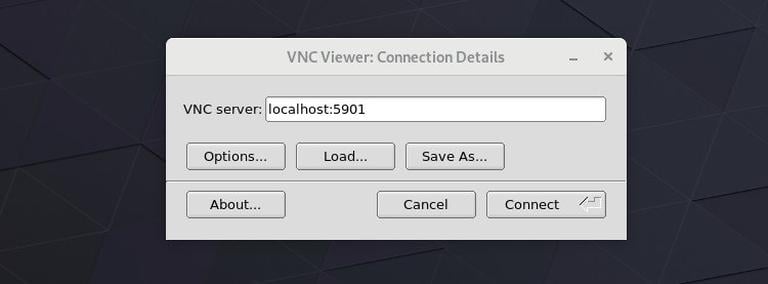
Connecting using Vncviewer
To connect to the remote Server, open your VNC viewer, and enter localhost:5901.
You can use any VNC viewer such as TigerVNC, TightVNC, RealVNC, UltraVNC, Vinagre, and VNC Viewer for Google Chrome .
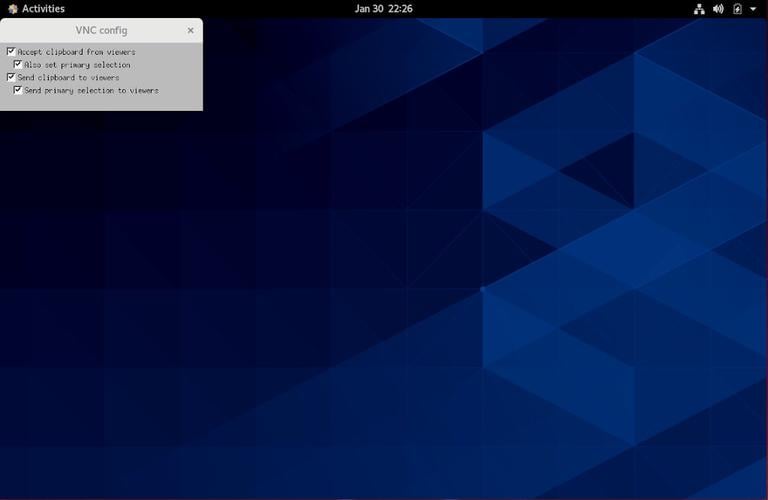
We’re using TigerVNC:
Enter the password when prompted, and you should see the default Gnome desktop. It should look something like this:
That’s it! You can now start working on your remote desktop from your local machine using your keyboard and mouse.
Conclusion
We’ve shown you how to set up a VNC server and connect to a remote CentOS 8 machine.
Feel free to leave a comment if you have any questions.