How to Change Hostname on CentOS 7
Updated on
•6 min read

This tutorial guides you through the process of changing a hostname on a CentOS 7 system.
The hostname is set at the time when the CentOS operating system is installed or if you are spinning up a virtual machine it is dynamically assigned to the instance at startup.
The methods described in this tutorial will work without the need of restarting your system.
Prerequisites
Before continuing with this tutorial, make sure you are logged in as a user with sudo privileges .
Understanding Host Names
A hostname is a label that identifies a machine on a network. You shouldn’t use the same hostname on two different machines on the same network.
There are three classes of hostname: static, pretty, and transient.
static- The traditional hostname, which can be set by the user, and is stored in the/etc/hostnamefile.pretty- A free-form UTF8 hostname used for presentation to the user. For exampleLinuxize's desktop.transient- A dynamic hostname maintained by the kernel which can be changed by DHCP or mDNS server at run time. By default, it is the same as thestatichostname.
It is recommended to use a fully-qualified domain name (FQDN
) for both static and transient names such as host.example.com.
Display the Current Hostname
To view the current hostname, enter the following command:
hostnamectl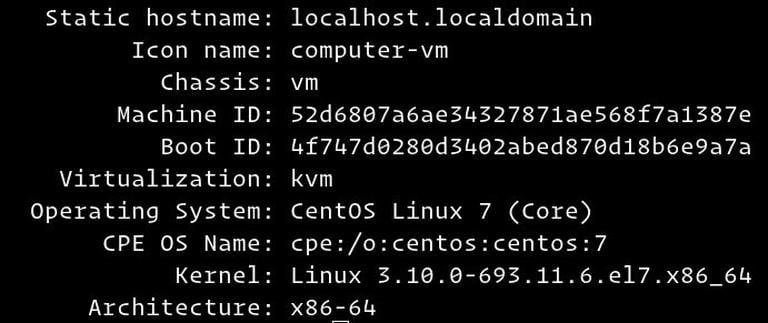
As you can see from the image above, the current hostname is set to localhost.localdomain.
Change the Hostname
Method 1: Using the hostnamectl command
In CentOS 7 we can change the system hostname and related settings using the command hostnamectl, the syntax is as follows:
sudo hostnamectl set-hostname host.example.comsudo hostnamectl set-hostname "Your Pretty HostName" --prettysudo hostnamectl set-hostname host.example.com --staticsudo hostnamectl set-hostname host.example.com --transient
For example is we want to change the system static hostname to host.linuxize.com, we can use the following command:
sudo hostnamectl set-hostname host.linuxize.comTo set the pretty hostname to Linuxize's desktop, enter:
sudo hostnamectl set-hostname "Linuxize's desktop" --prettyThe hostnamectl command does not produce output. On success, 0 is returned, a non-zero failure code otherwise.
Method 2: Using the nmtui command
nmtui is a text user interface for the NetworkManager which can also be used to change the hostname.
To start the nmtui utility run the following command:
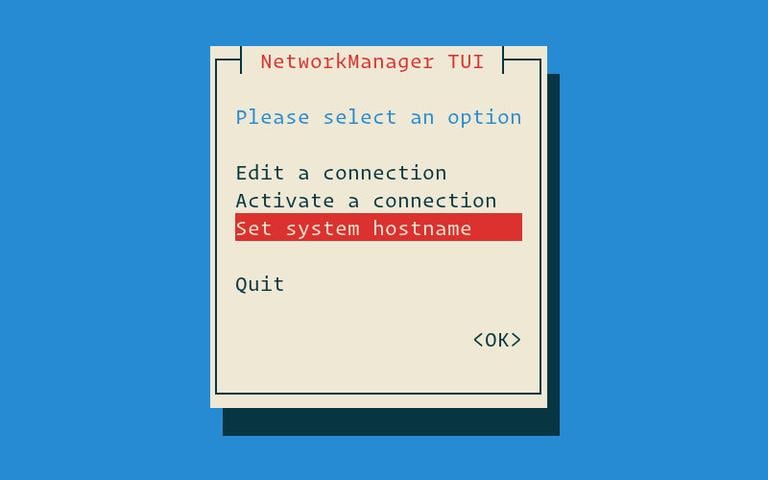
sudo nmtuiUse the arrow keys to navigate through the options, select Set system hostname and press Enter:
Set your new hostname:
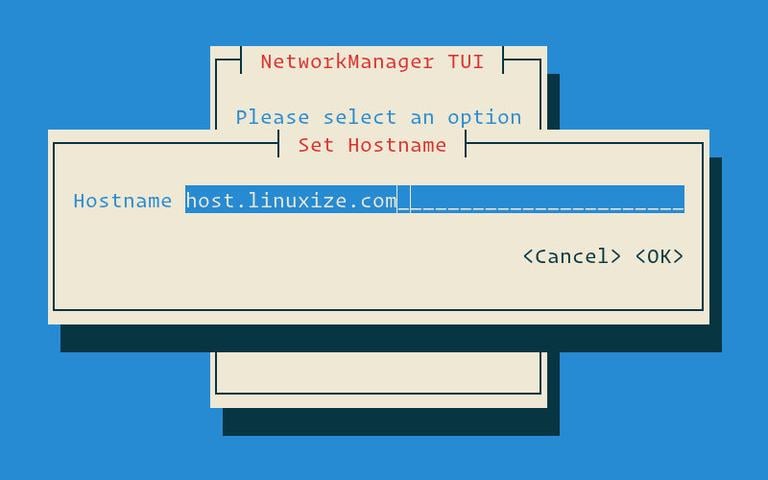
Press enter to confirm the hostname change:

Finally, restart the systemd-hostnamed service for the changes to take effect:
sudo systemctl restart systemd-hostnamedMethod 3: Using the nmcli command
nmcli is a command-line tool for controlling the NetworkManager which can also be used to change the hostname.
To view the current hostname type:
sudo nmcli general hostnameTo change the hostname to host.linuxize.com use the following command:
sudo nmcli general hostname host.linuxize.comFinally, restart the systemd-hostnamed service for the changes to take effect:
sudo systemctl restart systemd-hostnamedVerify the change
To verify that the hostname was successfully changed, use the hostnamectl command:
hostnamectlYour new hostname will be printed on the console:
   Static hostname: host.linuxize.com
   Pretty hostname: Linuxize's desktop
         Icon name: computer-vm
           Chassis: vm
        Machine ID: 52d6807a6ae34327871ae568f7a1387e
           Boot ID: 4f747d0280d3402abed870d18b6e9a7a
    Virtualization: kvm
  Operating System: CentOS Linux 7 (Core)
       CPE OS Name: cpe:/o:centos:centos:7
            Kernel: Linux 3.10.0-693.11.6.el7.x86_64
      Architecture: x86-64
Conclusion
In this tutorial, we have shown you 3 different methods for changing the hostname of your CentOS 7 server without restarting the machine.
Feel free to leave a comment if you have any questions.